Paging Dr. Cucumber! This will be my Over the Garden Wall crochet pattern masterpost thingy! (If you haven't seen it yet drop everything and go watch it!) The frog pattern was made by one of the production assistants for OTGW and it is absolutely a thing of beauty! I used Little Black Marker's alterations for the hands and feet and also supersized the whole pattern so now the frog is crazy super big! It is truly a statement frog! Everyone will be jealous of you!
The teapot hat is a pattern I made up myself and wrote down on the off chance anyone else needs it. I know traditionally you would make the teapot out of paper mache but personally I would break something like that on the first opportunity. A crocheted teapot also means it can be smashed down flat for travel or storage and it is super light and easy to attach to your head w/bobby pins!
More info and patterns for the frog, teapot hat, and cosplay outfit after the break!
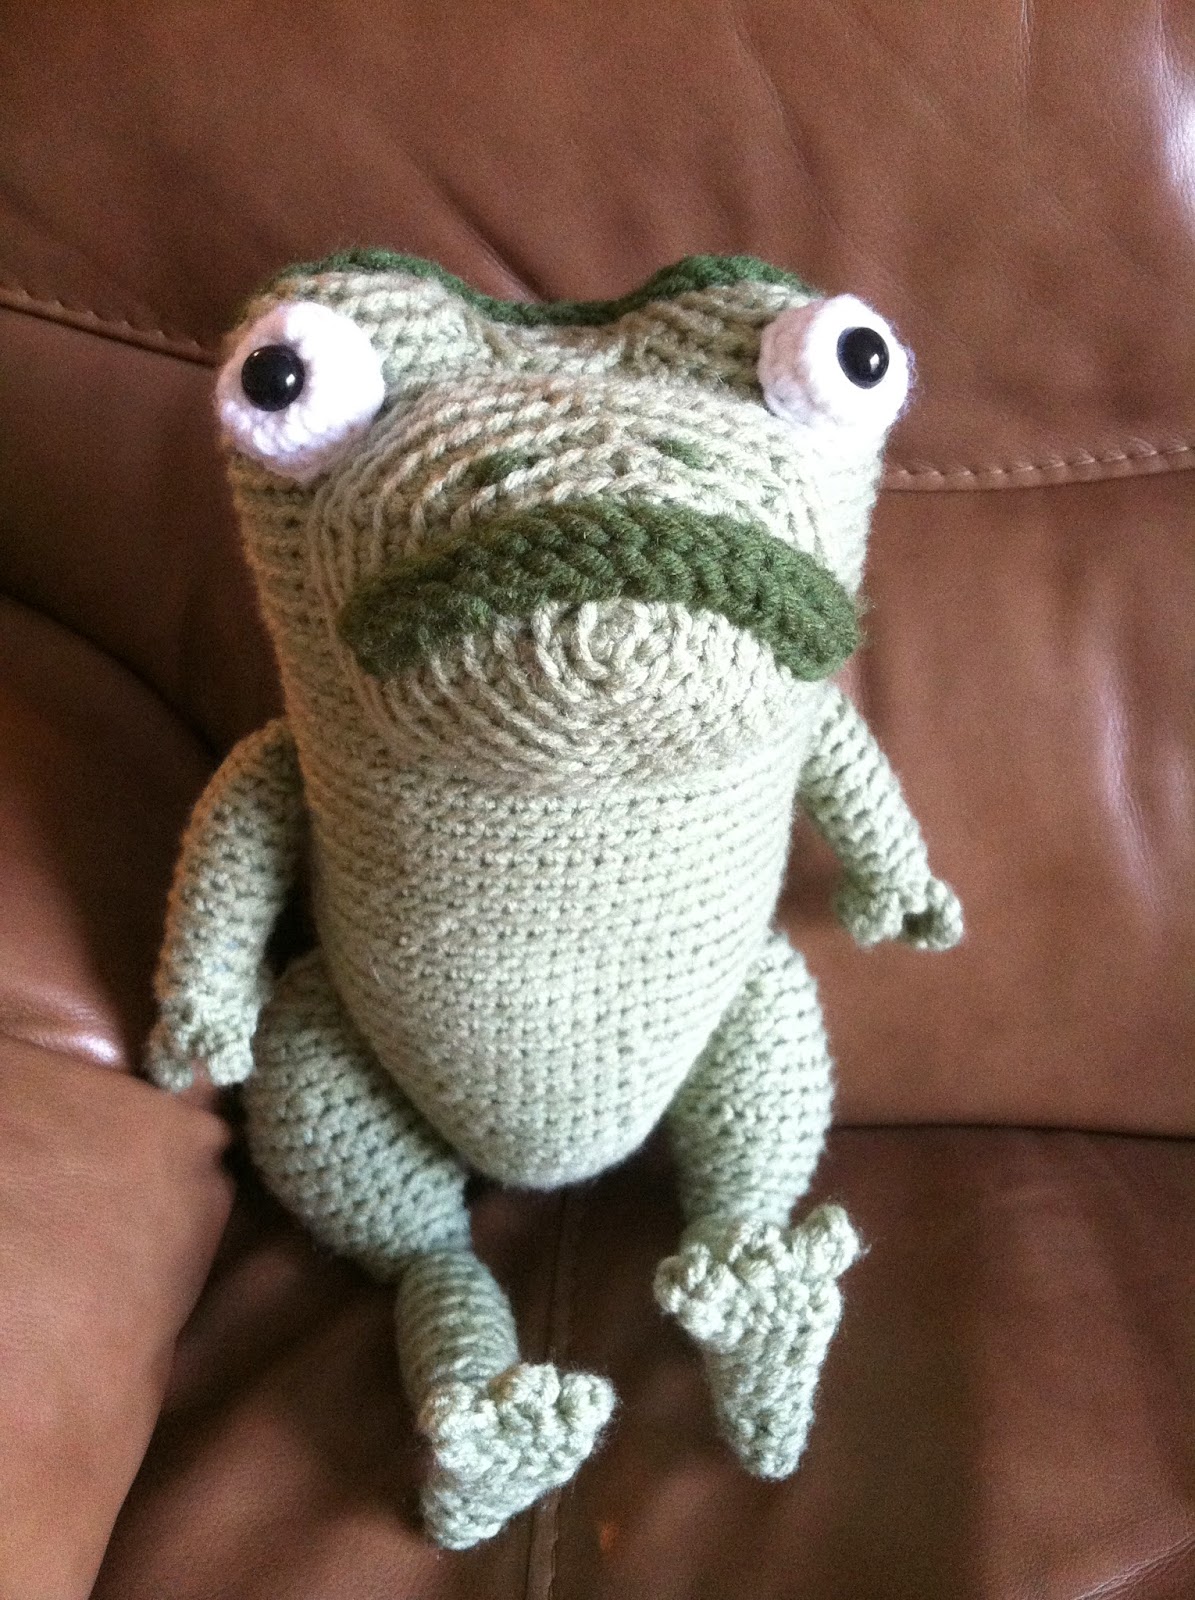
For the frog:
Mine ended up about a foot and a half long (including legs)
I used 2 strands of yarn held together as one (I take the strand from the outside of the skein and the inside of the skien and hold them together and crochet like it's just one strand, this is an easy way to make the pattern bigger) and an H size hook. For the back part of the frog it kept turning out too small for me (I have a habit of crocheting too tight >_<) so I used 3 strands of yarn held together as one and a J hook. For the hands and feet I used Little Black Marker's alterations, they are super cute!
Original pattern
Alterations for hands and feet

In case this is helpful to anyone here is how I made/obtained the clothing part of the cosplay:
Shirt was a white button down from the thrift store
necktie is a length of black ribbon
green pants/overalls were some Lady!Business pants I found at the thrift store for $2. They were crazy high, fit perfectly at the waist, and were super baggy in the leg. I cut the leg off above the knee and put in elastic and used the bottom part of the pants to make the suspenders.
Knee socks and mary jane shoes I already had
Purse was from a thrift store
tldr: The thrift store is your friend!


Now for the teapot hat:
The finished teapot is about 5-6 inches tall, diameter of base is about 8 inches.
The following pattern was written and designed by me and is copyrighted. You may not sell or reproduce this pattern in any way. Do not claim this pattern or plush as your own design. You may not transmit or distribute this pattern by any means. You may not sell this pattern. You may not sell what you make from this pattern. Please respect this, I spent a very long time designing this pattern, there is a great deal of effort and love put into this. Thank you very much for your understanding.
Read pattern carefully before starting, particularly the instructions at the beginning of the pattern. There are also many tips throughout the pattern and in the assembly section that will help you when making different pieces, be sure to read those too!
Materials:
* Gray yarn, I used worsted weight and got one of those super big 14 oz skeins but you could get 2 regular size skeins instead.
*Small amount of stuffing
*Large yarn needle for sewing pieces together
* H hook
*Straight pins for pinning pieces on before sewing them on
*Plastic shopping bags like you get from the grocery store ect, a whole bunch of them to stuff the hat with.
Note: there is no gauge for this pattern. The only thing that is important is that you have a tight stitch when crocheting. If you use the recommended hooks it should be fine but if you are someone who crochets more loosely you may want to reduce the hook size accordingly.
This pattern is worked in rounds (unless otherwise noted) and may use any the following techniques/abbreviations:
Sc- single crochet
inc- increase
dec- decrease, particularly you should use the invisible decrease if you know how to do it
sc in each sc or work even- single crochet in each single crochet, don't add any increases or decreases
R- round or row
Ch- chain
hdc- half double crochet
hdc inc- increase using hdc
hdc dec- decrease using hdc
# sc or sc #- for example 5 sc or sc 5 both mean to crochet in the next 5 sc, with one single crochet in each.
Repeat (*)- repeat what is between the asterisks * until you come to the end of the round, unless otherwise indicated
ring- magic ring. If you cannot do this technique then you may substitute this: ch 2 and sc however many were supposed to go in the ring into the second ch. However this will leave a small hole in the piece, this is why the magic ring is preferred, it leaves no visible hole. Many tutorials on how to do the magic ring are available online.
The numbers in parenthesis at the end of each row are the number of stitches you should have when that row is done. Mark the start of each round with a marker and move this marker as you complete rows/rounds.
Teapot body/main part (2 strands of yarn with H hook)
Round1- 6sc in ring (6)
R2- inc in each sc (12)
R3- *sc, inc * (18)
R4- *2sc, inc* (24)
R5- *3 sc, inc* (30)
R6- *4sc, inc* (36)
R7- *5sc, inc* (42)
R8- *6sc, inc* (48)
R9- *7sc, inc* (54)
R10- *8sc, inc* (60)
R11- *9sc ,inc* (66)
R12- *10sc, inc* (72)
R13- *11sc, inc* (78)
R14-18- sc in each sc (78)
R19- *11sc, dec* (72)
R20-22- sc in each sc (72)
R23- *10sc, dec* (66)
R24-25- sc in each sc (66)
R26- *9sc , dec* (60)
R27- *8sc, dec* (54)
R28- sc in each sc.
Finish off and weave in ends.
Handle (make with 2 strands of yarn and H hook)
Leave long tail at the start for sewing later.
Round1- 6 sc in ring (6)
R2- *inc* (12)
R3-25- sc in each sc (12)
Leave long tail for sewing. Do not stuff.
Spout (make with 2 strands of yarn and H hook)
Round1- 6 sc in ring (6)
R2- sc in each sc (6)
R3- inc, sc in rest (7)
R4- 3 sc, inc, 2 sc, inc (9)
R5-6- sc in each sc (9)
R7- 3 sc, inc, 3 sc, inc, sc (11)
R8- 4sc, inc, 4sc, inc, sc (13)
R9- Inc, inc, inc, sc 2, dec, dec, dec, sc 2 (13)
R10- sc in each sc (13)
R11-sc, inc, inc, inc, sc 2, dec, dec, dec, sc (13)
R12- 3sc, inc, 3 sc, inc, 3 sc, inc, sc (16)
R13- *4sc, inc* sc in last sc (19)
R14-17- sc in each sc (19)
Finish off and stuff the spout.
Flatten the handle on sew it on, sew the spout on. Try pinning them on first to check placement but be careful not to stab yourself!


To wear the hat:
Stuff the hat with plastic shopping bags, you probably already have a ton of these somewhere and they are excellent for helping the teapot keep its shape without adding weight. Also less messy than stuffing and the bags can be smashed down super flat in your suitcase then fluffed up and put in the hat later. Space saving!
Use a ton of bobby pins to pin the teapot to your head, I wore it all day and it didn't budge or bother me at all, it's super light! Also several people thought I was some sort of wizard since the bobby pins are basically invisible!
Hope this was helpful, let me know if you have questions!
Daww! It looks so cute! I haven't heard of the series before but I like the frog dude!
ReplyDeleteThis is insanely helpful!!!! Thank you so much and I will use this for my costume this year! <3
ReplyDeleteWondering on teapot size
ReplyDeleteThis was so helpful!! Thank you so much!!
ReplyDeletenice frog but its looks sad :(
ReplyDelete