
This pattern drove me absolutely nuts, I don't think there was anything on here that I didn't remake several times and I'm sure I wanted to give up on it more than once. But it was totally worth it because Noivern is awesome, how can you not like a fruit bat boom box pokemon? Also don't let the pattern scare you, it's not really that hard. Mostly it will require patience as there are a lot of parts to sew together but for someone with a few plushes under their belt it should be no problem. Let me know if you have any questions and I'll do my best to help! Enjoy!
(c) Kim Novak 2013
The following pattern was written and designed by me and is copyrighted. You may not sell or reproduce this pattern in any way. Do not claim this pattern or plush as your own design. You may not sell this pattern. You may not sell what you make from this pattern. Please respect this, I spent a very long time designing this plush and pattern, there is a great deal of effort and love put into this. Thank you very much for your understanding.
Read pattern carefully before starting, particularly the instructions at the beginning of the pattern. There are also many tips throughout the pattern that will help you when making different pieces, be sure to read those too! Pictures at the end of the pattern will help with sewing stuff on.
Materials:
* Black yarn
*Teal Yarn
Materials:
* Black yarn
*Teal Yarn
*Purple yarn
*Small amount of white yarn
*Small amount of red yarn
*Small amount of yellow yarn
*Small amount of fluffy bulky white yarn (see directions for back and chest fluff for more info)
*Large yarn needle for sewing pieces together
*Fiberfill/stuffing
**Optional: beans, rice, or plastic beads & pantyhose (for weight, more info after body pattern)
*G hook and F hook
*Straight pins for pining pieces on before sewing them on
Note: there is no gauge for this pattern. The only thing that is important is that you have a tight stitch when crocheting so that no stuffing will show through the finished pieces. If you use the recommended hooks it should be fine but if you are someone who crochets more loosely you may want to reduce the hook size accordingly.
This pattern is worked in rounds (unless otherwise noted) and uses the following techniques/abbreviations:
Sc- single crochet
inc- increase
dec- decrease, particularly you should use the invisible decrease if you know how to do it
sc in each sc- single crochet in each single crochet, don't add any increases or decreases
R- round or row
hdc- half double crochet
dc- double crochet
Repeat (*)- repeat what is between the asterisks * until you come to the end of the round, unless otherwise indicated
ring- magic ring. If you cannot do this technique then you may substitute this: ch 2 and sc however many were supposed to go in the ring into the second ch. However this will leave a small hole in the piece, this is why the magic ring is preferred, it leaves no visible hole. Many tutorials on how to do the magic ring are available online.
Working in rows- when working in rows please ch 1 and turn at the end of each row, it will not be written out to save time.
The numbers in parenthesis at the end of each row are the number of stitches you should have when that row is done. Mark the start of each round with a marker and move this marker as you complete rows.
IMPORTANT NOTE!
Some pieces are worked with TWO strands of yarn together, the instructions will say what parts. You may do this by taking the strand on the outside of the skien and the one which comes from the inside of the skien together. Crochet with two strands the same way you would crochet if you had only one. This will yield a bigger plush faster and with less effort than crocheting with only one strand.
The assembly for this guy is kind of crazy, I wrote out suggestions for how I assembled it at the end of the pattern. Some parts have to be sewed on before others to make things easier ect.
Body (G hook, 2 strands of black yarn, make 1)
If you want you can put a weight in the bottom of the plush. Fill a nylon with plastic pellets, rice ect and tie it off, making a sort of bean bag thing. Put this in the bottom of the plush before stuffing with fiberfill. This is optional but it gives nice weight to the finished plush and helps it sit up nicely.
R1-6 sc in ring (6)
R2- *inc* (12)
R3- *sc, inc* (18)
R4-* sc 2, inc* (24)
R5-9- sc in each sc (24)
R10- *sc 2, dec* (18)
R11-16- sc in each sc (18)
R17- *sc 2, inc* (24)
R18-21- sc in each sc (24)
R22- *sc 2, dec* (18)
R23-sc in each sc (18) start stuffing if you haven't
R24- *sc 1, dec* (12)
R25- *4 sc, dec* (10) change to white yarn
R26-30 sc in each sc (10) Stuff the neck really firmly! Like it's your job! It needs to be able to support the head and ears.
R31- *3sc, dec* (8)
Head (F hook, 1 strand of purple yarn, make 1)
R1-6 sc in ring (6)
R2- *inc* (12)
R3- *sc, inc* (18)
R4-* sc 2, inc* (24)
R5- *3 sc, inc* (30)
R6-11- sc in each sc (30)
R12- *3 sc, dec* (24) start stuffing
R13- *2sc, dec* (18)
R14- * 1 sc, dec* (12)
R15- *Dec* (6)
Finish stuffing and sew closed.
Top of head (F hook, black yarn, 1 strand, make 1)
This part is like a cap that you will sew onto the purple part of the head. When you sew it on, do so at an angle, so that the black part is tipped forward a little bit on the face side. Look at reference pictures of Noivern for help.
R1-6 sc in ring (6)
R2- *inc* (12)
R3- *sc, inc* (18)
R4-* sc 2, inc* (24)
R5- *3 sc, inc* (30)
R6-12- sc in each sc (30)
R13- *3 sc, dec* (24)
Finish off, leaving a long tail for sewing it to the head.
Ears ( F hook, 1 strand of black yarn, make 2)
Do NOT stuff these!
R1-R1-6 sc in ring (6)
R2- *inc* (12)
R3- *sc, inc* (18)
R4-* sc 2, inc* (24)
R5- *3 sc, inc* (30)
R6- *4sc, inc* (36)
R7-12- sc in each sc (36)
R13- *4sc, dec* (30)
R14- *3 sc, dec* (24)
R15- *2 sc, dec* (18)
R16- *1 sc, dec* (12)
R17- * 1 sc, dec* (8)
Do not stuff these, they should make a sort of concave shape, see pictures for help. Leave long tail for sewing. The ears will be sewed to each other as well as to the head, the will be joined along one side, see pictures for help.
Inside of ear ( make 2 with F hook, 1 strand of teal yarn)
R1-R1-6 sc in ring (6)
R2- *inc* (12)
R3- *sc, inc* (18)
R4-* sc 2, inc* (24)
R5- *3 sc, inc* (30)
R6- *4sc, inc* (36)
Finish off leaving a long tail for sewing. Crochet the black circles on the ear using surface crochet (if you don't know how to do it, google it, it's pretty easy). You can also embroider the circles if you want too. Be sure to add the black circles before sewing the inside of the ear to the main part of the ear.
 |
| Inside of the ear flattened out to show ring detail |
Top of ear spikes (make 2 in black with G hook and 2 strands of yarn)
Worked in rows. Start with a long tail so you can sew it on later.
R1- ch 4, sc in 2nd ch from hook and each after (3 sc)
R2- dec, sc 1 (2)
R3- sc 2 (2)
R4- dec (1)
Belly (make 1 in purple, with F hook and 1 strand of yarn)
This starts out in the round but will change to being worked in rows, the pattern will say when.
R1- R1-6 sc in ring (6)
R2- *inc* (12)
R3- *sc, inc* (18)
R4-* sc 2, inc* (24)
R5- sc in each sc, ch 1 and turn(24) Now we're going to start working in rows!
Row 6- Sc 12, leave rest of stitches unworked, ch 1 and turn (12)
R7-14- sc in each sc, ch 1 and turn (12)
R15- * 2 sc, dec* ch 1 and turn (9)
R16-22- sc in each sc, ch 1 and turn (9)
R23-* 2 sc, inc* ch 1 and turn (12)
R24-28- sc in each sc, ch 1 and turn (12)
R29- *2 sc, dec* ch 1 and turn (9)
R30- dec, sc 5, dec, ch 1 and turn (7)
R31- dec, sc 3, dec (5)
R32- sc in each sc (5)
Finish off leaving a long tail for sewing.
Tail (make w F hook and 1 strand of black yarn)
Spread the increases out evenly within the round and between rounds to make the shape even. That is, don't put all the increases at the start of the round, try to put a few scs between them and vary where you put them from round to round.
Stuff as you go
R1- 4 sc in ring (4)
R2- 1 increase, sc in rest (5)
R3- 2 increases spread out evenly, sc rest (7)
R4-7- sc in each sc (7)
R8- 1 increase, sc in rest (8)
R9-10- sc in each sc (8)
R11- 1 inc, sc in rest (9)
R12- sc in each sc (9)
R13- sc in each sc (9)
R14- 1 inc, sc in rest (10)
R15-22- sc in each sc (10)
R23- 1 inc, sc in rest (11)
R24-27- sc in each sc (11)
R28- 1 inc, sc in rest (12)
R29-32- sc in each sc (12)
R33- 1 inc, sc in rest (13)
R34- 1 inc, sc in rest (14)
R35- 2 increases spread out evenly, sc in rest (16)
R36- 1 inc, sc in rest (17)
R37- sc in each sc (17)
leave a long tail for sewing
Underside of tail (make 1 in teal w/F hook and 1 strand)
Worked in rows
R1- ch 7, sc in 2nd ch from hook and rest (6sc)
R2-3- sc in each sc (6)
R4- sc 4, dec (5)
R5- sc in each sc (5)
R6- 3 sc, dec (4)
R7-15 sc in each sc (4)
R16- dec, sc 3 (3)
R17-27- sc in each sc (3)
R28- dec, sc (2)
R29-30- sc in each sc (2)
R31- dec (1)
Leave long tail for sewing to underside of tail
Tail spikes (make 2 w/F hook and 1 strand of black)
Worked in rows
R1- ch 3, sc in 2nd ch from hook and rest (2 sc)
R2- sc in each sc (2)
R3- dec (1)
leave tail for sewing to tail
Legs (make 2 with F hook and 1 strand of black yarn)
Spread the inc out evenly like you did for the tail. Stuff as you go, stuff lightly.
R1- 6 sc in ring (6)
R2- 3 increases, sc in rest (9)
R3-2 inc, sc in rest (11)
R4- 2 inc, sc in rest (13)
R5-7- sc in each sc (13)
R8- 3 inc, sc in rest (16)
R9-10- sc in each sc (16)
R11- sc, dec, dec, dec, sc, sc, sc, sc, inc, inc, inc, sc, sc (16) This part is making the bend in the leg that will be the knee
R12- *sc 7, inc* (18)
R13- *4sc, inc* sc in last 3 stitches (21)
R14-21- sc in each sc (21)
R22- *5sc, dec* (18)
R23- *4sc, dec* (15)
R24- *3sc, dec* (12)
Finish stuffing and sew shut.
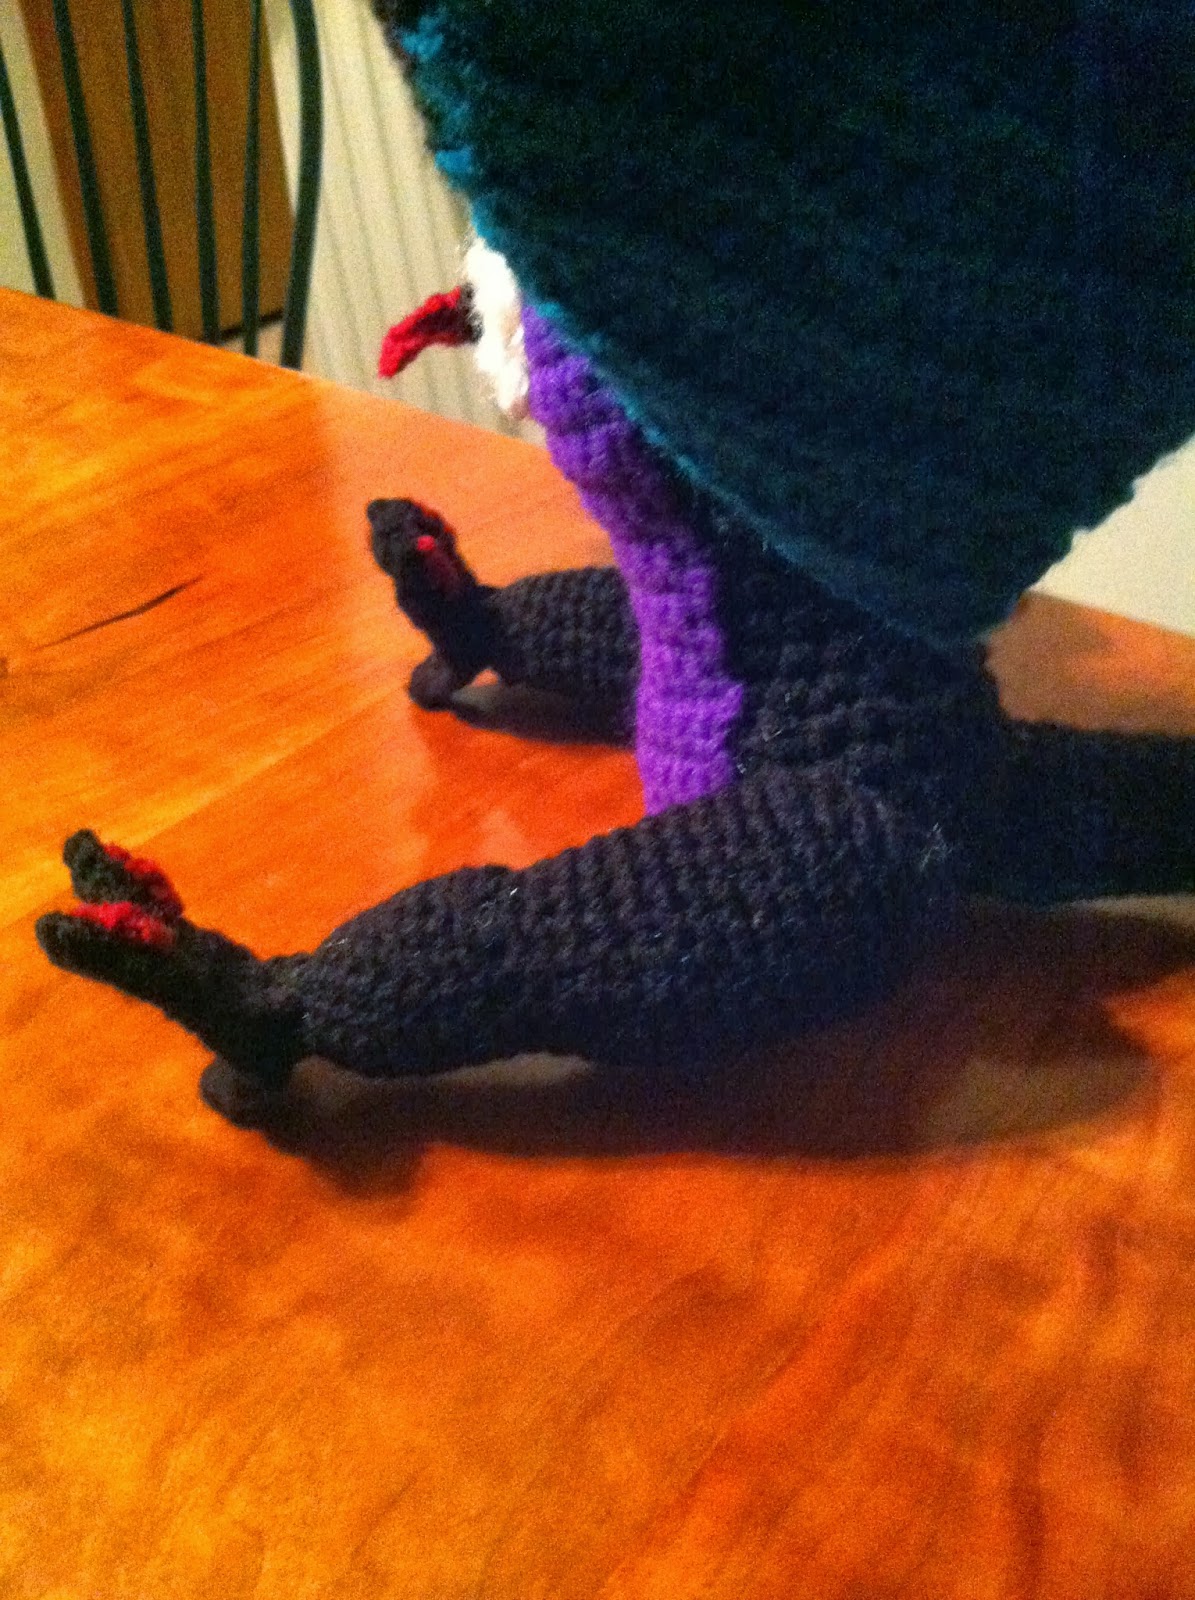
Feet (make 2 w/black yarn, G hook and 2 strands of yarn)
Worked in rows
R1- ch 2, sc in 2nd ch from hook (1)
R2- inc (2)
R3- inc, inc (4)
R5-7- sc in each sc (4)
R8- sc 2, ch 1 and turn, leave rest unworked. (2)
R9- sc 2 (2)
R10- dec (1)
Finish off. Reattach yarn in row 7 and repeat Row 8-10 to make the other toe. Embroider toenails on with red. If you are careful you can just do it on the one side so it won't show on the bottom of the foot.
Main part of wing (make 4 of these, 2 in teal and 2 in black with Fhook and 1 strand of yarn)
Worked in rows. Row 1 is the side that will be sewed onto the body
R1- ch 15, hdc in 2nd ch from hook and all the rest (14 hdc)
R2-9- hdc in each hdc (14)
R10- inc in first and last stitch of row and hdc in all others (16)
R11- hdc in each hdc (16)
R12- inc in the first and last stitch of the row and hdc in all others (18)
R13-inc in the first and last stitch of the row and hdc in all others (20)
R14- hdc in each hdc (20)
R15- inc in the first and last stitch of the row and hdc in all others (22)
R16- inc in the first and last stitch of the row and hdc in all others (24)
R17- hdc in each hdc (24)
R18- inc in the first and last stitch of the row and hdc in all others (26)
R19- inc in the first and last stitch of the row and hdc in all others (28)
R20- hdc in each hdc (28)
Side part of wing (make 4 of these, 2 in teal and 2 in purple w/ F hook and 1 strand of yarn)
Worked in rows. Row 1 is the side at the top of the wing near the claws.
R1- ch 2, hdc in 2nd ch from hook (1)
R2- inc (2)
R3- inc, hdc in rest (3)
R4- hdc 2, inc (4)
R5-6- hdc in each hdc (4)
R7- inc, hdc in rest (5)
R8-10- hdc in each hdc (5)
R11- inc, hdc in rest (6)
R12- hdc to end, inc in last stitch (7)
R13- hdc in each hdc (7)
R14- hdc to end, dec over last 2 stitches (6)
R15- dec, hdc rest (5)
R16-19- hdc in each hdc (5)
R20- hdc, dec over last 2 stitches (4)
R21-25- hdc in each hdc (4)
R26- hdc 2, dec (3)
R27- hdc in each hdc (3)
R28- dec, hdc (2)
R29- hdc in each hdc (2)
R30- dec (1)
Wing assembly: Use pictures to help you! Sew the teal side part of wing to the teal main part of wing. Sew the purple side part of wing to the black main part of wing. Put the black/purple wing against the teal wing so they match up. Now using black yarn, crochet the two pieces together (if you don't know how to do this, tutorials are online) starting from where the shoulder would be at the top of the wing (the part farthest from the ground) and across to where the claws will be. Then you reach the purple part start crocheting the wings together with purple until you reach the point of the purple part. Now the inside curve of the purple part and along the bottom part of the wing (the part closest to the ground) should be sewn together (NOT crocheted) using black yarn and taking care not to let it show on the teal side. Sew up the side of the wing (the part that rests against the back) however you like. If you need help with this part either look at official pictures of Noivern or at my pictures to help you. From the underside of Noivern's wing you can see black along the top and purple along the side so you will crochet in these areas to mimic this. Along the bottom of it's wing it's just teal so you will sew here and not let any black be visible if you can help it.
Once wings are sewn together front to back, embroider the black veins/lines on the wings using pictures to help you, use two strands of black yarn for a nice thick line.
 |
| Picture to explain weird wing assembly, sorry for the chicken scratch! |
Wing spikes (the little spikes coming off the bottom, make 4, two for each wing, in black with 2 strands of yarn and G hook)
Attach yarn to where you want the spike to be on the wing.
Ch 5, sc in 2nd ch from hook and each after (4).
Slip stitch to body of wing.
You can also make these separate and sew them on but I'm lazy so I did it this way bc I hate sewing stuff on.
Claws (make 6, 3 on each wing using red and F hook, 1 strand of yarn)
Attach yarn to top of wing, ch 5, slip stitch 2 times, sc 2 times, slip stitch to join to body of wing. Repeat to make the correct number of claws on each wing.
A note about chest and back fluff: I used bulky fluffy yarn to get the look of fur for these parts. Since it's hard to sew with the fluffy yarn you can use regular white yarn to sew it on the body later. You should be able to find something similar at your local craft store but if you can't try using two strands of white yarn to make them then tease the yarn with a brush or the sticky/hook part of velcro to make it look fluffier. A great commenter also mentioned you could use a loop stitch to get a fluffy look too! If you don't know how to do it, search for it online, it's pretty fun to do!
 |
| This is what the fluffy yarn looks like compared to regular yarn. |
Chest Fluff (make 1 using G hook and fluffy white yarn)
Worked in rows.
R1- ch2, hdc in ch. (1)
R2- inc (2 hdc) (2)
R3- inc, hdc 2 (3)
R4- inc, hdc 3 (4)
R5- Inc, hdc 4 (5)
Back fluff (make 1 w/ G hook and fluffy white yarn)
Worked in rows
R1- ch 10, hdc in 2nd ch from hook and rest (9)
R2- inc, hdc in rest (10)
R3- inc, hdc to end and inc in last hdc (12)
R4-hdc in each hdc (12)
R5- dec, hdc to end and dec across last 2 stitches (10)
R6-dec, hdc to end and dec across last 2 stitches (7)
R7- dec, dec somewhere in the middle and across the last 2 stitches, hdc in any others (4)
R8- dec, hdc in rest (3)
R9- dec, hdc (2)
R10- dec (1)
Nose (make 2 in red w/ F hook and 1 strand)
R1- ch 11, dc in 3rd ch from hook, dc, dc, hdc, hdc, hdc, sc, sc, slip stitch in last ch. Finish off
Eyes (make 2 w/F hook and 1 strand starting w/ yellow)
For the yellow part of the eye you'll be working in an oval, you work around the starting chain in a circle, crocheting along the front then back of the chain to make a full oval shape.
R1- ch 4, 2 sc in 2nd ch from hook, sc, 3 sc in end and start working around the other side, sc, sc in last (this ch should now have 3 sc in it and you're back at the beginning.) ( 8)
Now attach the teal yarn at one end of the eye, sc 2, ch 1 and turn, dec and finish off.
Whiskers (make 2 w/F hook and 1 strand of black yarn)
worked in rows
R1- ch 4, sc in 2nd ch from hook and rest (3)
R2- dec, sc (2)
R3- sc in each sc (2)
R4- dec (1)
R5- sc (1)
Fangs (make 2 with F hood and 1 strand of black yarn)
Row1- ch2, sc1, ch 1 and turn (1)
R2- Inc, ch 1 and turn (2)
R3- Inc, Sc (3) finish off
Fangs (make 2 with F hood and 1 strand of black yarn)
Row1- ch2, sc1, ch 1 and turn (1)
R2- Inc, ch 1 and turn (2)
R3- Inc, Sc (3) finish off
Assembly
This is just a suggestion, do it however is easiest for you but some things should be sewed on before others (like wings before back fluff)
- black top of head part to head
- head to body
- embroider or surface crochet inside of ears
- inside of ears to main part of ears
- sew ears together at sides
- sew ears to head
- sew spikes to ears
- Sew belly to body, use pins to hold it tightly in place. Spread it out tightly so there won't be any wrinkles or bumps in it.
- Sew side of wing to main part of wing.
- Sew front of wing to back following special instructions in the wing part of the pattern
- Embroider veins/black lines on wings
- Crochet on the wing spikes at the bottom of the wings
- Add claws onto wings
- sew wings onto body
- sew legs onto body
- sew feet onto legs
- sew underside of tail to tail
- sew spikes to tail
- sew tail to body
- sew front/chest fluff on body
- sew back fluff onto back
- sew nose pieces on
- sew eyes on, can embroider pupil before or after, whatevers easier for you
- embroider nostrils
- sew on fangs
- sew on whiskers
That's it! Congrats!
Click pictures to make them bigger
Click pictures to make them bigger


Awesome!!!!! I am so going to make this as soon as I get some fluffy white yarn. :)
ReplyDeleteAwesome! Hope you have fun making it! ^_^
Deletea good substitution for fluffy yarn is loop stitches. for this project I would use a smaller sized crochet hook to make the loops of the stitch instead of your finger. google how to make loop stitches and my comment will make more sense.lol
DeleteThat's a great idea, I completely forgot about that stitch! I'll update the pattern with a note on it, thank you so much!
DeleteDon't think I'll get enough patience to do this, but this is pure awesomeness!
ReplyDeleteI love your works!
Thanks so much! And to tell the truth I almost didn't have the patience for it lol!
DeleteDon't think I'll get enough patience to do this, but this is pure awesomeness!
ReplyDeleteI love your works!
Thanks for coming up with this. It is going to be my cousin's Christmas gift. She will probably get it after Christmas though, lol. All my 3 younger cousins, who are not so young any more, wanted pokemon plushy dolls.
ReplyDeleteThat's so nice of you to make one, plushies are the best gifts!
DeleteThis is certainly one of the most complex pokemon gurumi I've seen. I've been looking for a challenge and it looks like I found one! I'm grateful you took the time to write the pattern down!
ReplyDeleteThank you so much for the compliment, I'm really glad so many people like it! It is easily the hardest thing I've made and I'm so happy people are up to the challenge of it, have fun making it!
DeleteI don't see the fangs in the pattern. Did you forget to put it down or something?
ReplyDeleteSorry about that, I must have missed it the first time! I added it to the end of the pattern ^_^
DeleteThanks! I'm probably between 40-50% done :)
Deleteawesome! Looks like he takes a lot of black and blue yarn! Dammit I don't have any!
ReplyDelete(/ o _o/) _1___1_ Table flipping guy!
T T
Not having enough yarn is the worst! If you're the same anon who just learned to crochet I wanted to warn you that this one is a bit complicated, if only because it has so many parts. But it'll be a fun challenge!
DeleteI can crochet now ( and yes i am the same anon) I wasn't planning on doing this one YET but someday when I get yarn I will. It feels awesome that I can finally crochet because I have been practising so much now! I will write my name at the end of comments so you know it me!
ReplyDeleteTrinity ( you can call me Trin for short and I am 13 years old!)
Trinity,
DeleteThat's wonderful! Keep practicing and making lots of stuff and soon you will be making your own patterns too! Once you read a lot of patterns you learn how to make shapes ect on your own and making your own patterns is a snap! (I have a few posts on here about making your own patterns too if you want more detail) Have fun!
Thanks so much! I have done Aphid 777's Baby Umbreon and Woldreamers Pokeball and now I have gotten the hang of it and I got the snap! It is so awesome to crochet i have wanted to do it for a long time
DeleteLove it how he is holding the apple!
ReplyDeleteMade it. Your pattern is awesome.
ReplyDeletehttp://www.ravelry.com/projects/SayaTheFox/noivern
How tall is this finished product . I made my so. The noibat a while ago and now wants this and wants it to be at least twice the size of the Noibat
ReplyDelete